Introduction
It has been an interesting year for the final major project. At the start, my group discussed ideas for the project and worked on it until the final date. This blog will allow me to examine my project work followed by analysis and critical review. Also, I will reflect on my work to show my strengths, weaknesses and target areas.
Our main plan for the major project was to develop an animatic where a hunter accidentally encounters with an extra-terrestrial ghastly monster. This is where both characters battle each other afterwards. The final scene shows the human’s blood splatter on the bark as a sign of defeat.
Drawing Element
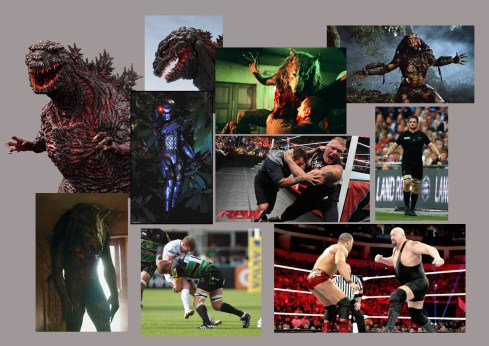
My drawing skills have effectively improved after I studied my references closely. Firstly, I produced several rough sketches to back the modelling development (Fig. 1). My sketches were related to my monster character inspired by various dinosaurs from the Jurassic Park Franchise, ‘Bossk’ from Star Wars Franchise and various sports activities such as rugby and wrestling. These allowed me to look closely and study the structure of the muscular body figures. These were then followed by further sketches in the final stage of my monster character (Fig. 2). The next step was to begin 3D elements.
(Fig. 1)
(Fig.2)
Modelling Element
For my monster character, the plan was to use a ZBrush to develop our monster character with modelling and texturing features together as quickly as possible. In addition, I developed my ZBrush modelling experience e.g. I know differences in various modelling tools. Firstly I started off with a basic shape of a sphere and changed it into a rough shape of a human body (3DTOTALPUBLISHING, 2014). I continued to model the body until it is completely ready to be added with more details. Next, a dinosaur head was modelled onto my human body(Fig. 01) and this was inspired by various references that related to dinosaurs mostly from Jurassic Park franchise, (Universal Pictures, 2017). This allowed me to inspect the structure of predator type dinosaur’s head shape more closely. There were many changes and additional details applied to the character to make it look more natural and atrocious. From suggestions, I changed it to become more natural as the character’s back was more linear than curved.
(Fig. 01)

(Fig. 02)

Texturing Element
Once the model was completed and checked, I created a skin texture on the ZBrush. This texture decision was an inspiration from dinosaurs in ‘Jurassic Park’ franchise (Universal Pictures, 2017). There are many fascinating and colourful dinosaurs that allowed me develop more knowledge of them (Fig. 01). These were ranging from light to dark colours in complex patterns. My decision to select colours for the dinosaur character were brown to grey along with red tinted patterns on the forehead (Fig. 02).
(Fig. 01)

(Fig. 02)
Texturing Element
My texture skills have improved while I was working on the model. I made enhancements to the suit where it would display the complex and camouflage patterns on the surface instead of dull and plain colours. This issue was fixed when I went through the suit’s texture and applied more colours to it. Also, I added camouflage patterns to the suit as well. So that this can make my character to look and become more aggressive. (Fig. 01) Sadly the only flawless about the quality of this suit appeared to be inadequate. This can be improved if I spend more time through UV feature and add more details to it if possible, to establish a rich texture for my suit. Also, I used a new shader on Maya 2017 version, and this feature is called “AI Skin” where it allows several layers of textures to produce an ultra-rich quality in texture as possible.
(Fig. 01)
Now I can work with UV features on ZBrush. After some practice, I fully understand these features and I was ready to export the character model included texture materials onto Maya. I was quite pleased with the texturing outcome from using the camouflage patterns to cover up unwanted pixels. This fix made my texture look more normal as in nature. The texture looked a bit chunky on certain areas e.g. eye sockets. I was able to solve the problem myself.
Rigging and Animation Element
My skill in rigging skills has been solved by using a third-party add-on as I was not satisfied with Maya’s default rig system because often it would not work effectively. At first, I decided to use Maya’s feature ‘Auto-Rig’ that can establish a skeleton automatically. While I continue to work on this rigged system, and then I started to struggle with this feature because of its confusing apparatuses which stopped me from using this feature. This rigged system was a waste of time, so I decided to find another way to fix this issue. Luckily this was quickly sorted when I decided to look up and find a third-party add-on that does the same purpose as Maya but more effective. This was to help save time and speed up on the development. The only downside with this add-on was that there were many unfamiliar adjustments with purposes behind them were clueless to me. So I decided to leave them on default so that they would not affect my model in any way. In my own time, I hope to spend and study on Maya’s default rigging system so that I would not need to use these add-ons anymore. O’Hailey (2013) explains more about Maya’s default rigging system and I can use this improve my knowledge based on rigging.
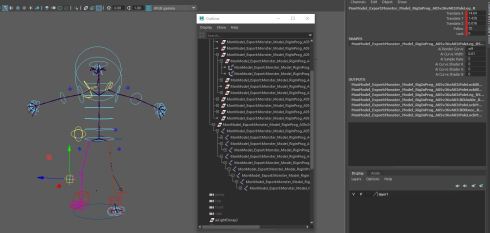
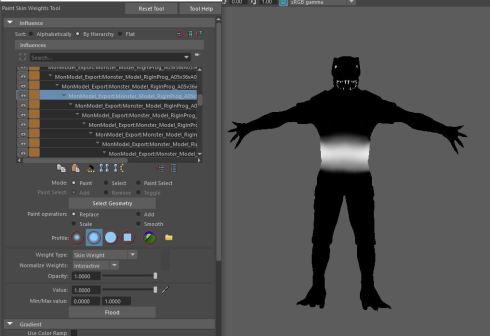
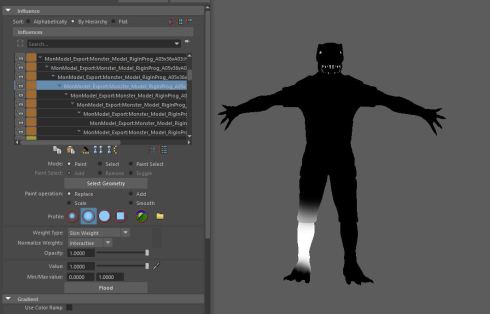
My skill in paint weights improved enormously as I spent lots of effort on this work. When the rigging task was done and added to my character, next, I applied various paint weights to my character so that it can do movements. At first, it was irritating that this tool would not work effectively. The issue that caused this were incredibly high polygons on my character model, so I needed to decrease these as carefully as possible. This issue made it difficult to apply paint weights as it was causing computers to delay multiple times. This was fixed after using Zbrush to decrease these to roughly 200 thousand in numbers. Also, I copied the weight from the model and pasted it to the suit followed by several fixes where I need to manually paint and fix on several body parts myself. After re to check for any problems, finally my model is fully completed and ready to be used for the final render. Although there is one minor problem where the model is sticking through the suit. I tried everything on Maya to fix this issue. Although this problem would not matter anyway because I checked every single camera shot in our animatic to ensure that this problem went unnoticed throughout the whole scene.
My animation of human movements have improved. When I begin my animation development I studied my references which provide useful images of sport activities e.g. wrestling and rugby. These references allowed me to look closely and study the human body and how it perform in sports activities. This study provided numerous details e.g. arms swinging and legs rotating. From this research, I noticed that being muscular makes it harder to swing arms to the rear and legs tend to rotate more slowly than arms. When I have sufficient details, I am ready to begin the next stage.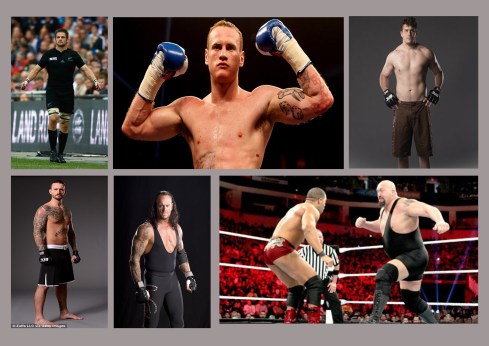
 (All images found on Google. I do not own any of these pictures.)
My animation skills have improved with my monster model. I started with my character’s core to work effectively on time, speed and directions of my character’s movement. These poses ranged from reaction to the arrow impact, roaring and charging. I have been using this feature since the first, and I became more effective than before. This experience allows me to work more comfortably with these skills and these would be transferable into the work environment. For example, I used my animation skills to work on minor parts such as arms and legs followed by hands and feet. At first, all these were done in the rough draft. I polished my animation skills recently. When completed, I double check on my animation work to ensure that the animation is fully polished. (Fig. 01). These animations were fairly decent although I should spend more time on the graph editor where I could smooth any movements. Because of this decision, my character would not perform in awkward and shaky movements during the scene. Overall, I am pleased with what I managed to produce in the end.
(Fig. 01)
Visual Effect Element
My Visual Effect skill increased dramatically as I put lots of effort into this module. This was when I discussed this effect with my group where the blood splatter appears and impacts onto tree bark followed by slow dripping. I made a decision to develop this effect from another practical module. I can recreate this effect now that I am experienced. The only drawback about this blood effect is that this can take a long time to set it up, then go through adjustments to pick the correct values that provide the realistic appearance of the blood splatters as possible. (Fig. 01)
(Fig. 01)
Luckily, I had a backup plan for the blood effect. I used a tree texture. I created 2D images of blood splatter on the model, and this was developed on Photoshop with various drawing tools. Blood splatters started invisible until a few seconds later until they appear and splash across the bark realistically. This was the right decision to make as I was left with no other choice. The outcome looks good enough but would be great if I improved this by adding more colour and detail to the blood texture.
